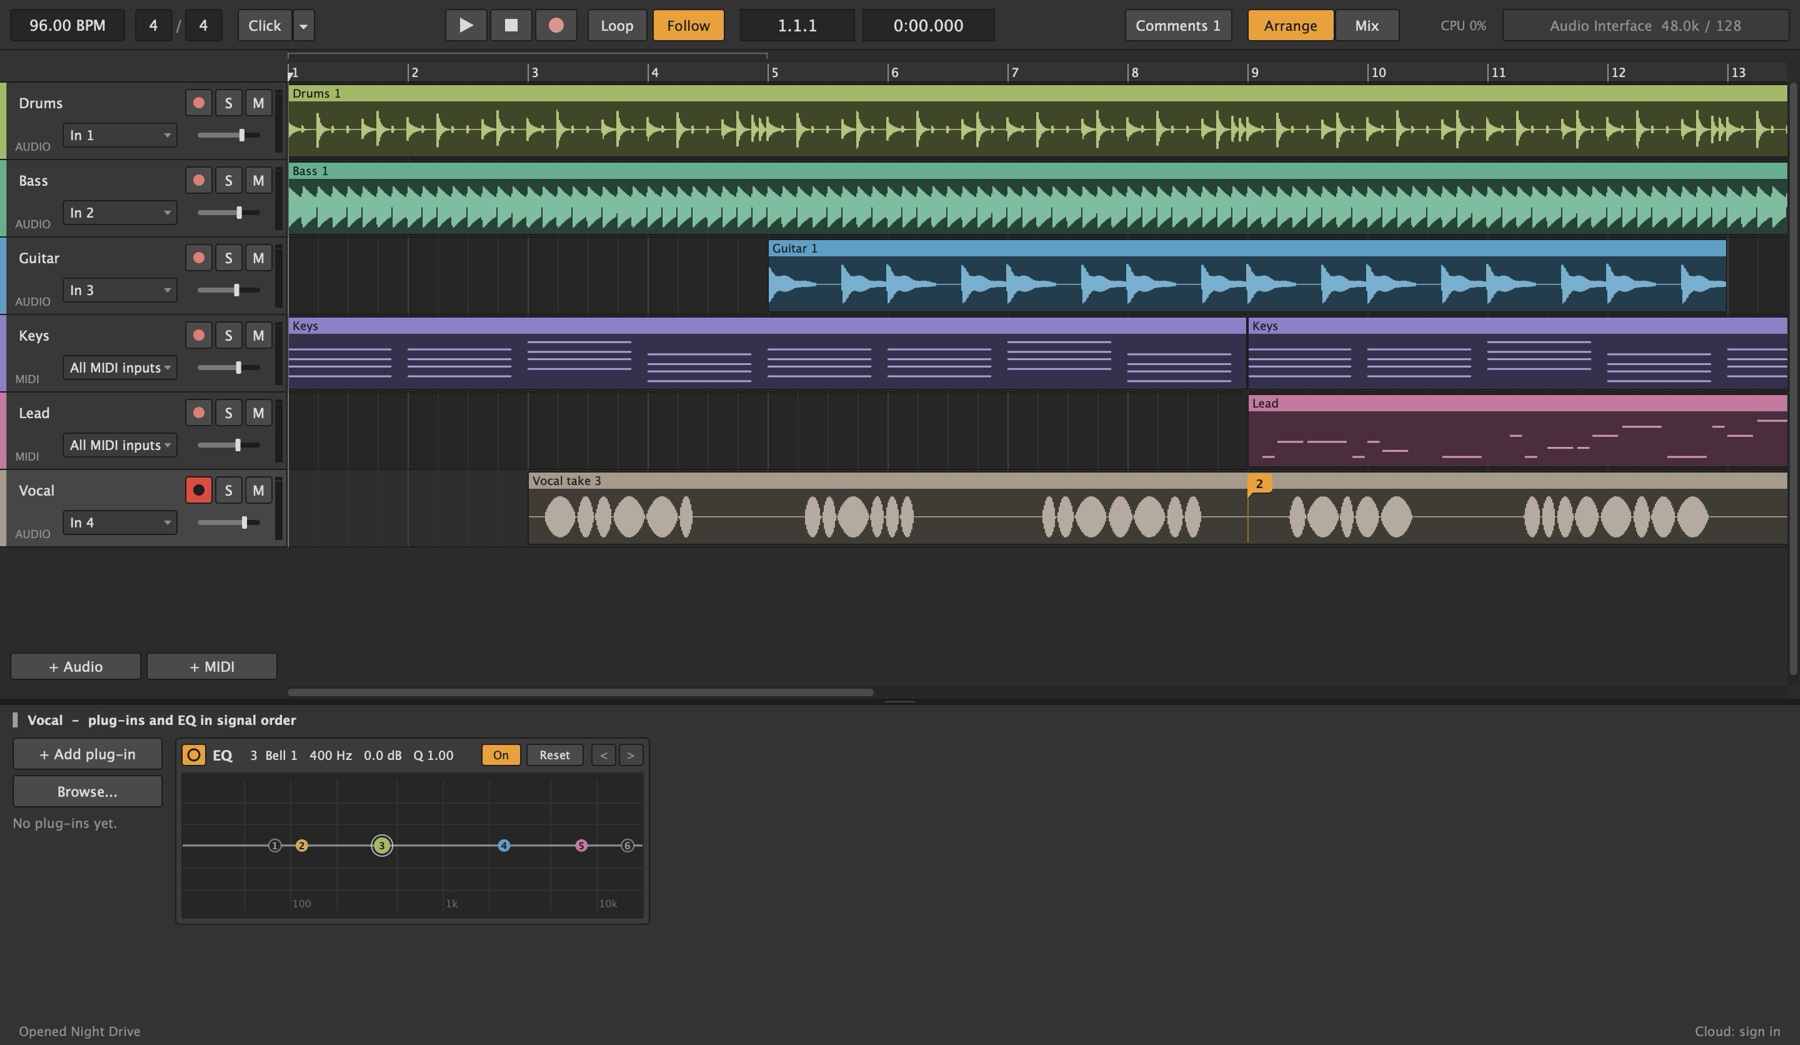
The transport

From left to right:
- Tempo and time signature. Drag a number up or down to change it (hold Shift for fine steps), or double-click it and type. Lathe has one tempo per song.
- Click turns the metronome on and off (C). The arrow next to it sets the count-in: see Recording.
- Play, Stop and Record (Space and R). Play starts from the start marker. Stop twice goes back to the start.
- Loop (L) plays the loop region over and over. Drag in the top strip of the ruler to set it.
- Follow (F) keeps the playhead in view while the song plays. Turn it off to scroll anywhere while it plays.
- The position, in bar, beat and sixteenth, and the time in minutes and seconds.
- Comments opens the song's comments (see Lathe Cloud).
- Arrange and Mix switch between the song and the mixer (Tab).
- CPU is how much of each audio block's time Lathe needs: see Performance.
- The audio interface, its sample rate and buffer size. Click it to change them.
Tracks and clips
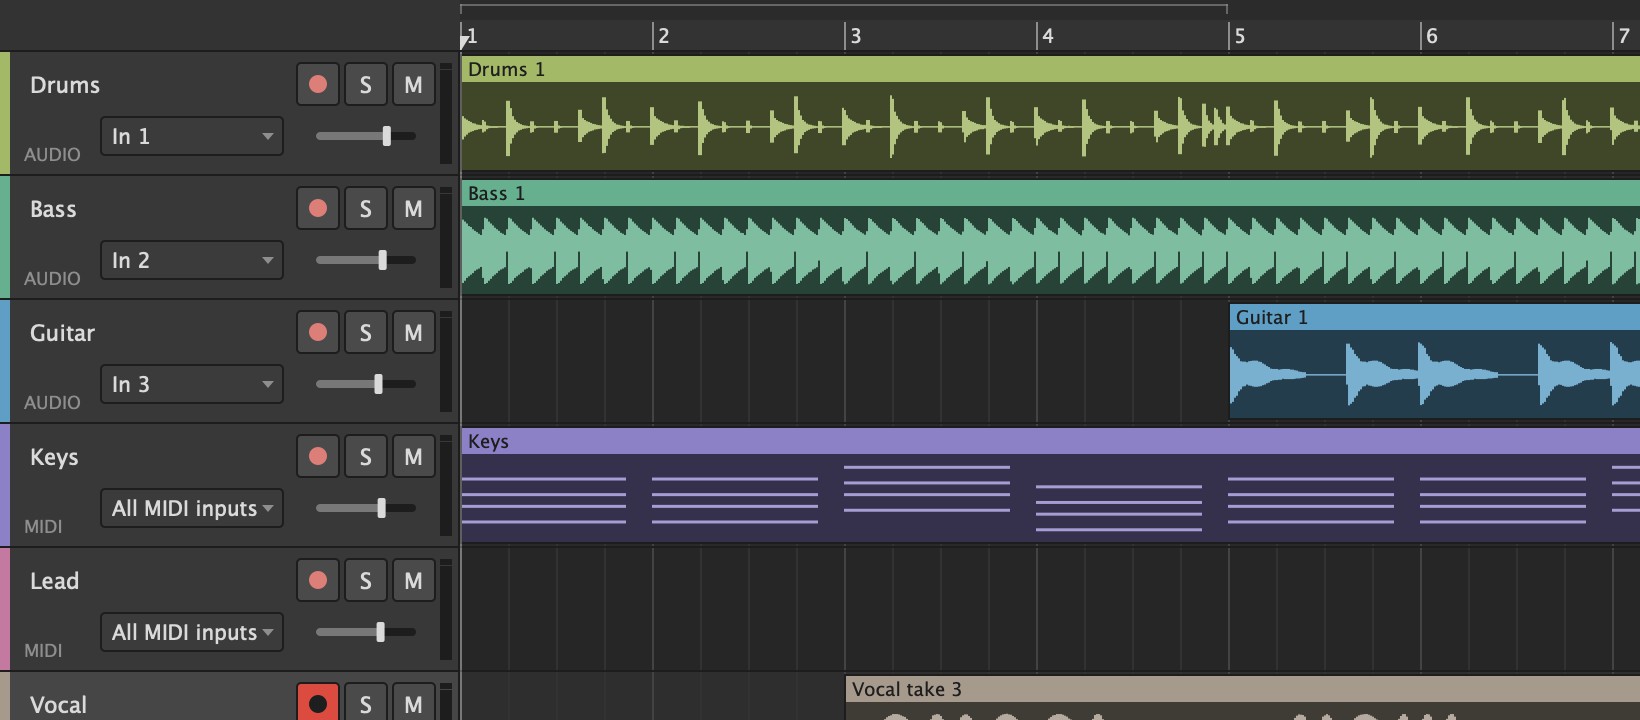
Each track has a header on the left and a lane of clips on the right. In the header:
- The name. Double-click it to rename the track.
- The round arm button, then S (solo) and M (mute).
- The input: an input of your interface, a MIDI input, or another track. See Recording.
- A volume fader, and a level meter at the right edge.
- Under the name, what kind of track it is: AUDIO or MIDI.
Clips are the coloured blocks in the lanes: audio clips show their waveform, MIDI clips their notes. Click empty lane space to put the start marker there (where Play starts and Paste goes). + Audio and + MIDI under the tracks add a track. Arranging has the rest.
Speech bubbles on a lane are comments about that moment in the song. Click one to open the conversation.
The device panel

Below the song, the selected track's plug-ins and its channel EQ, in signal order: the sound goes through them left to right. + Add plug-in picks from a list, and Browse... opens the plug-in browser. Click a track to show its devices. Drag the divider above the panel to make it taller or shorter. Instruments and effects and the channel EQ have the details.
The mixer
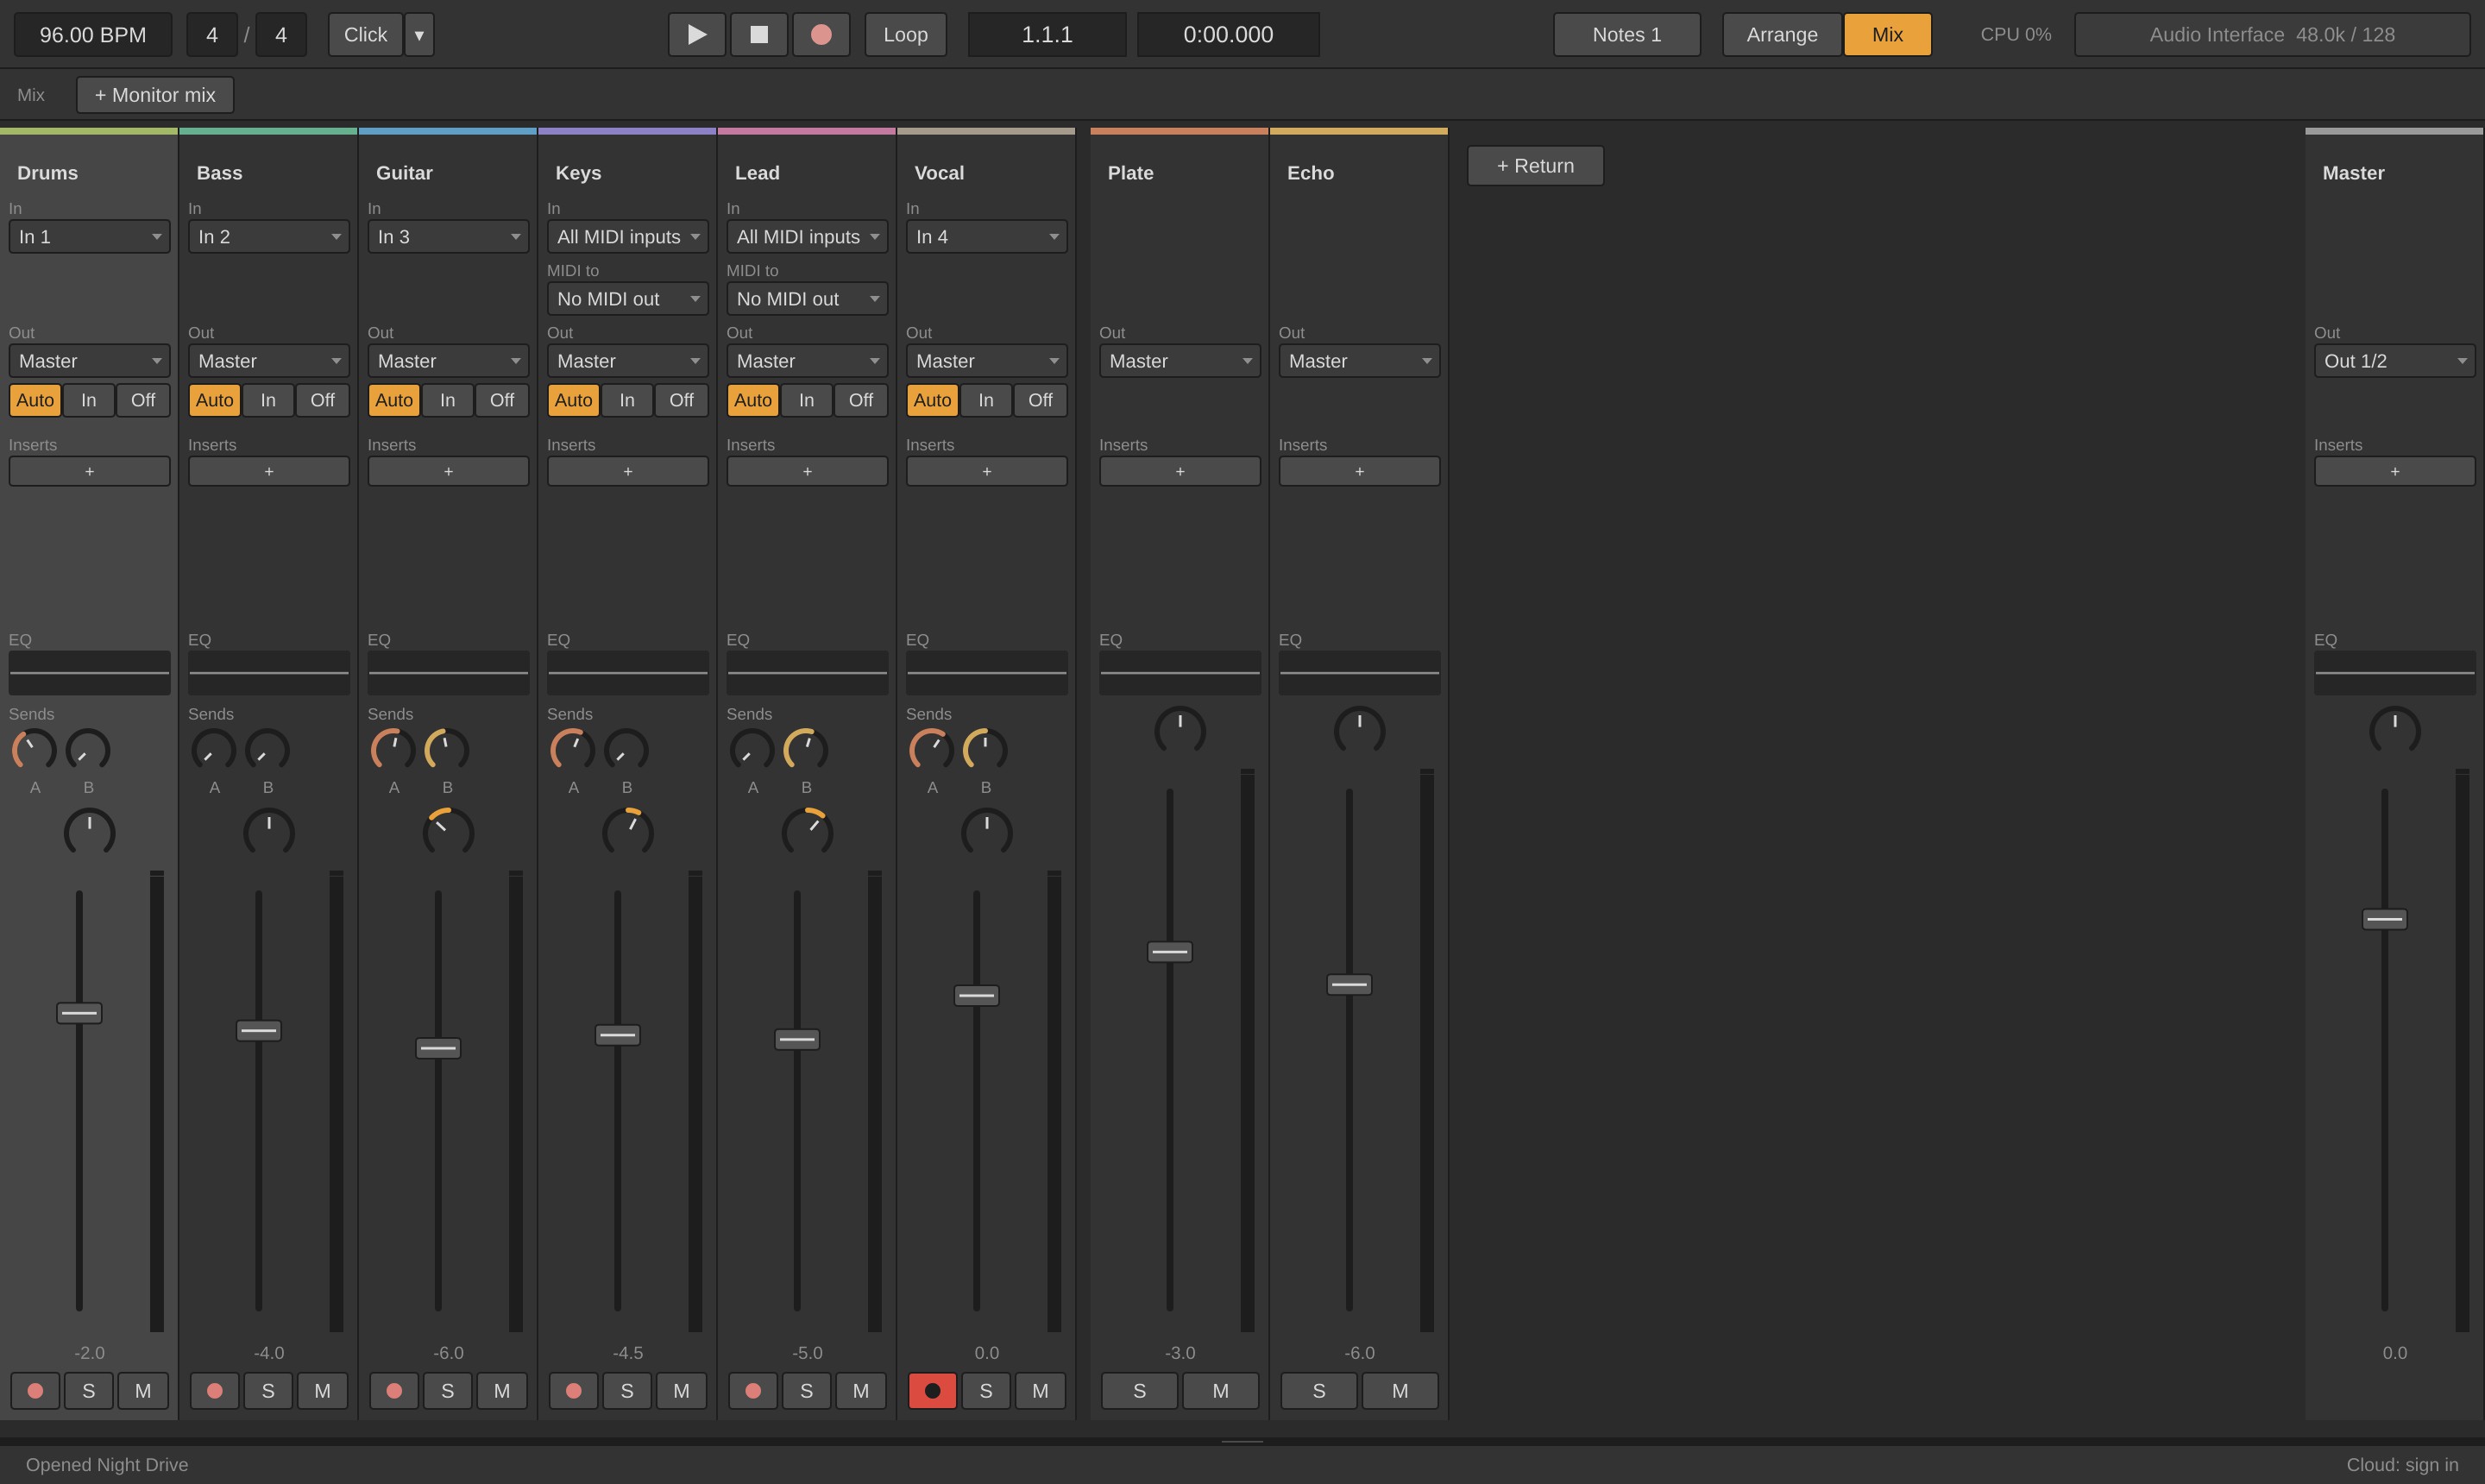
Tab (or Mix in the transport) shows the mixer: a strip per track, then the returns, group buses and the master. Each strip has its EQ curve, sends, pan, fader and meter, and where its sound goes. See Mixing.
The piano roll
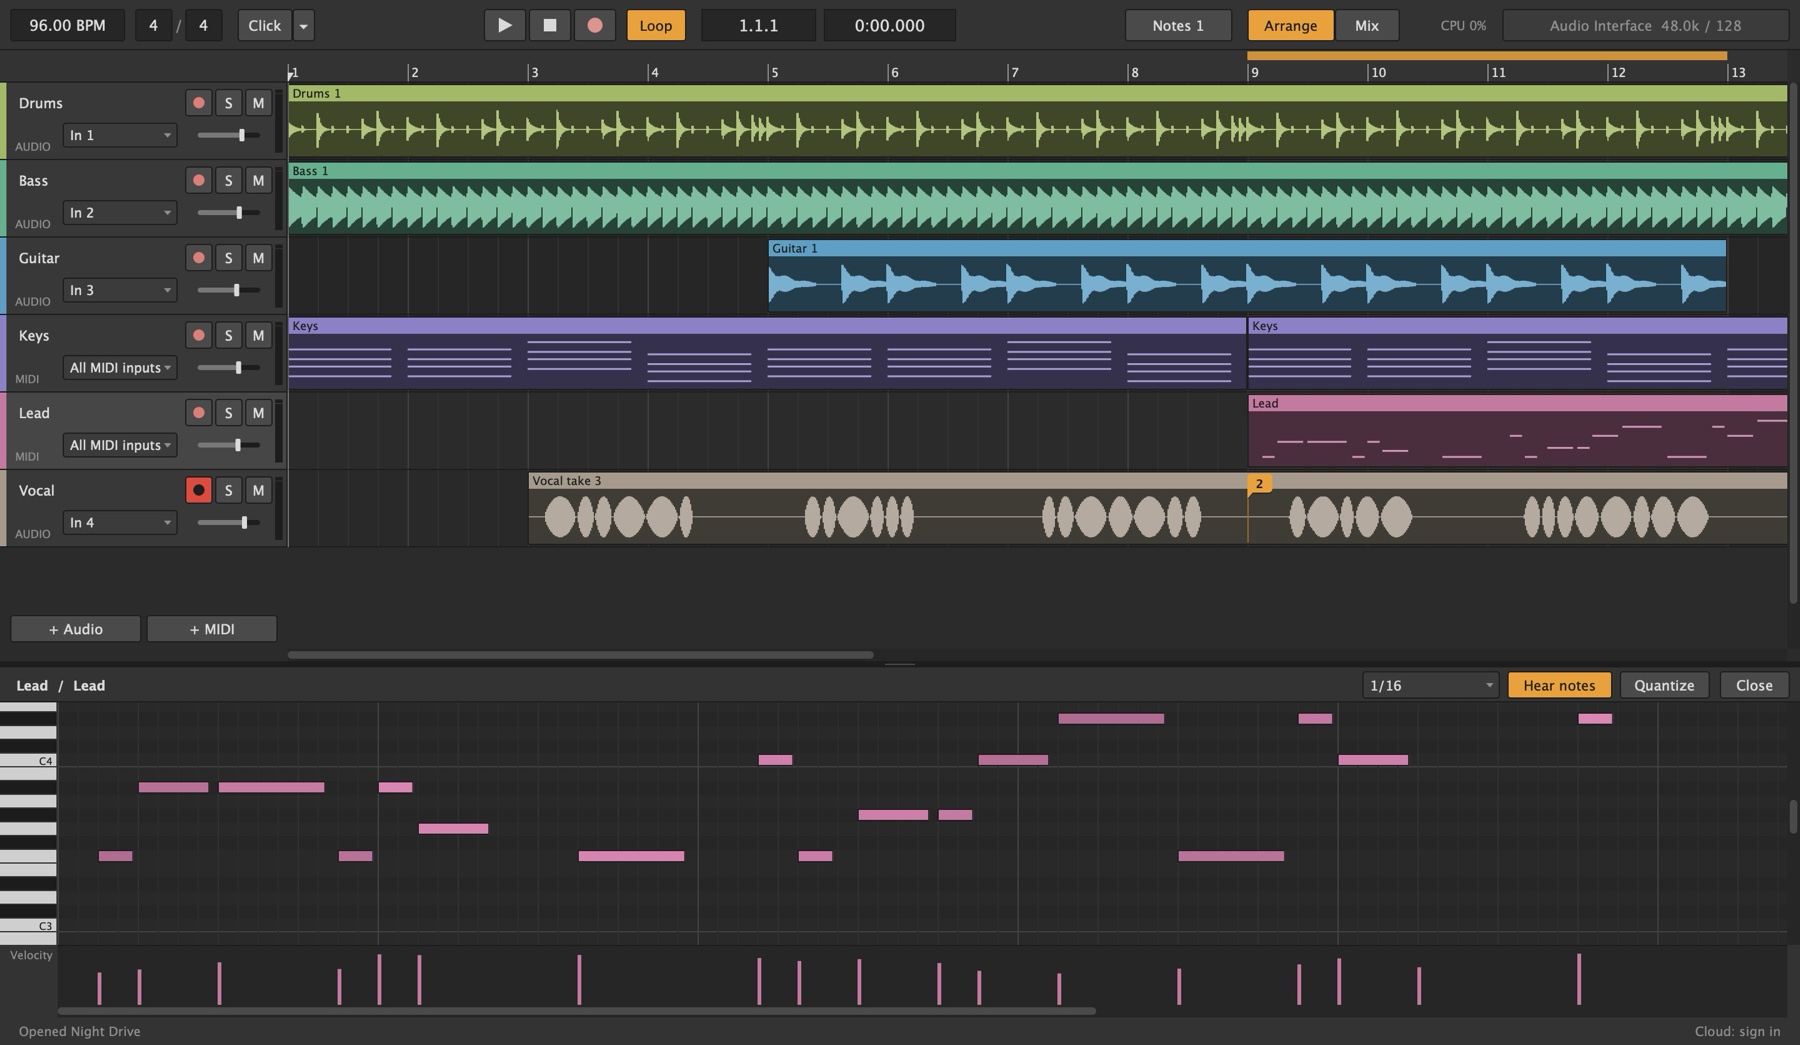
Double-click a MIDI clip (or right-click it and choose Edit notes...) to open its notes in the piano roll. See MIDI and the piano roll.
The status bar
The line at the very bottom says what Lathe just did, and what to do next when something needs you ("Imported 2 MIDI clips on 2 new tracks: add instruments to hear them."). At the right it shows Lathe Cloud (signed in or not, and the song's revision; click it for History) and, when there's one, Update available.