Lathe's own devices load like any plug-in (the same chain, undo, saving and AI assistant tools), but nothing needs installing or scanning, and a bandmate who opens your Lathe Cloud song has them too.
The device panel
Click a track to see its plug-ins and channel EQ in the panel under the song, in the order the sound goes through them.
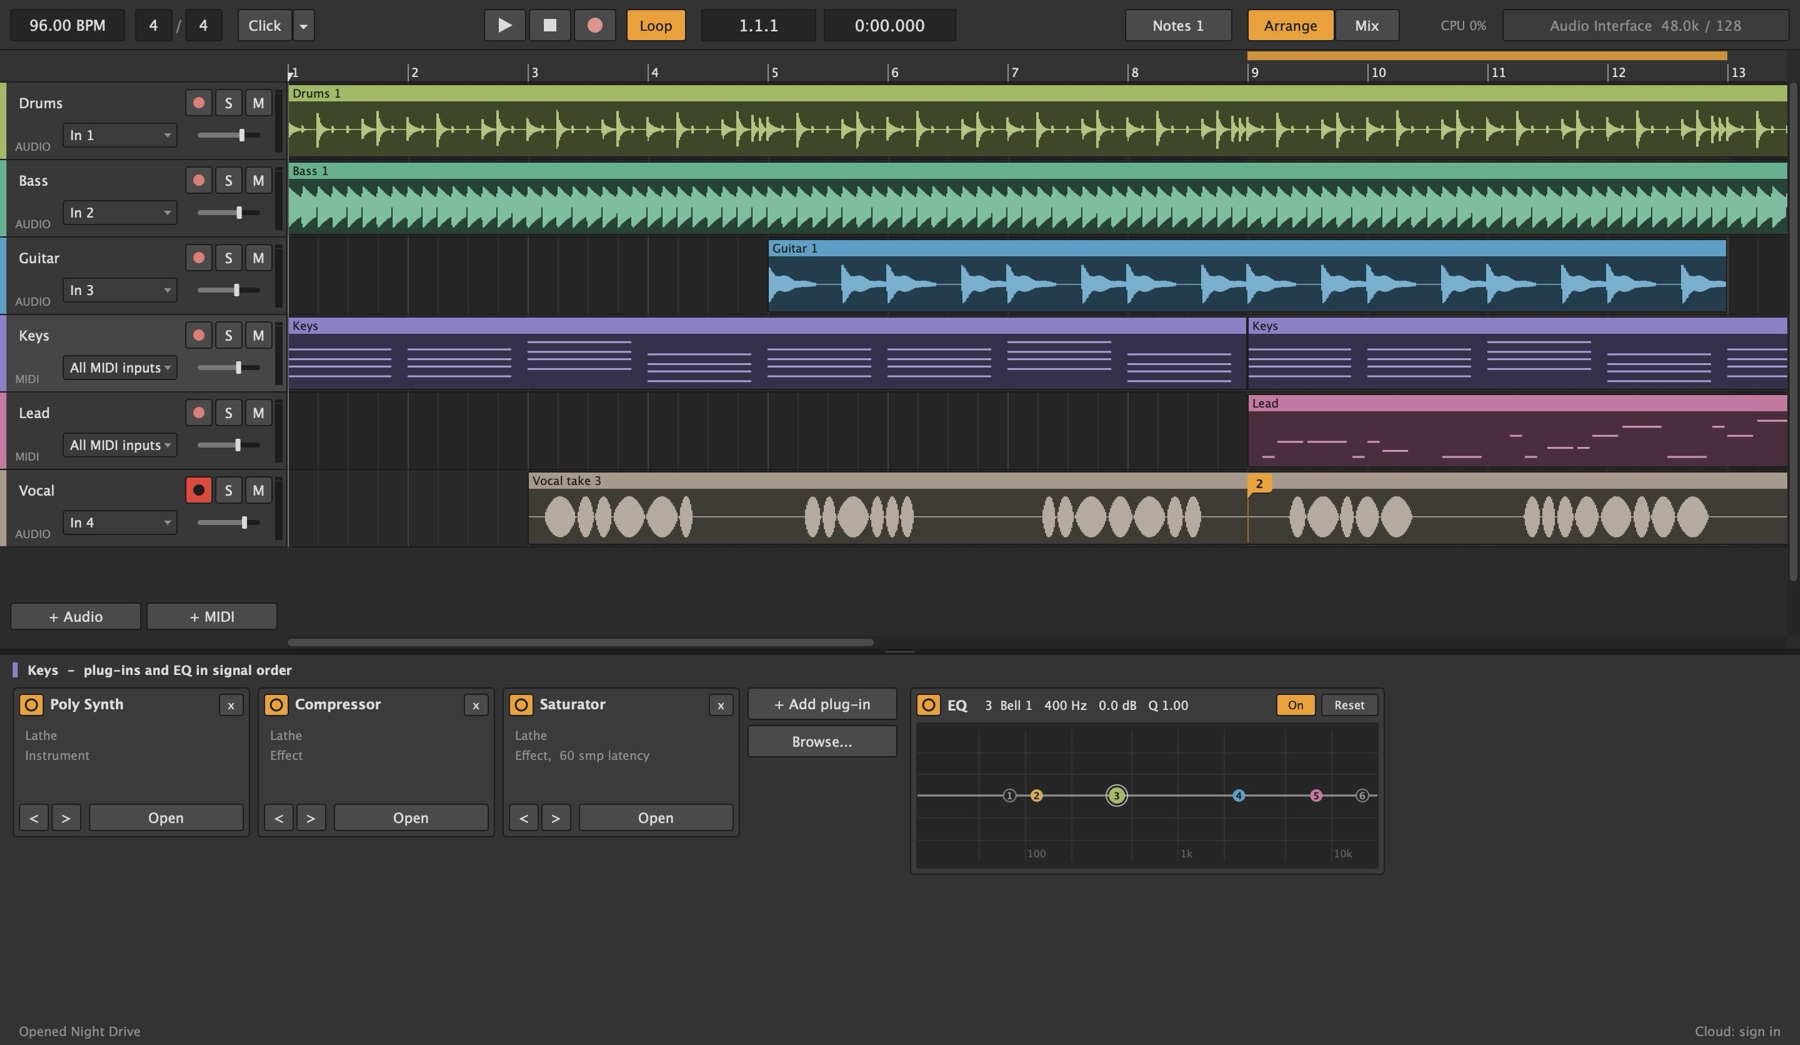
- + Add plug-in picks one from a list. Browse... opens the plug-in browser.
- Drag a card by its name to move it in the chain. A line shows where it will land; Escape leaves it where it was.
- Right-click a card for Open (its own window), Bypass, Move earlier, Move later, Remove and, for VST3 plug-ins, Run Separately.
- On a MIDI track, the instrument comes first and the effects after it. A note generator goes before the instrument it drives.
Every device has presets: the menu and the arrows at the top of its panel. Put Reverb or Delay on a return and it starts at Mix 100%, since the return's dry sound is already in the mix.
Instruments
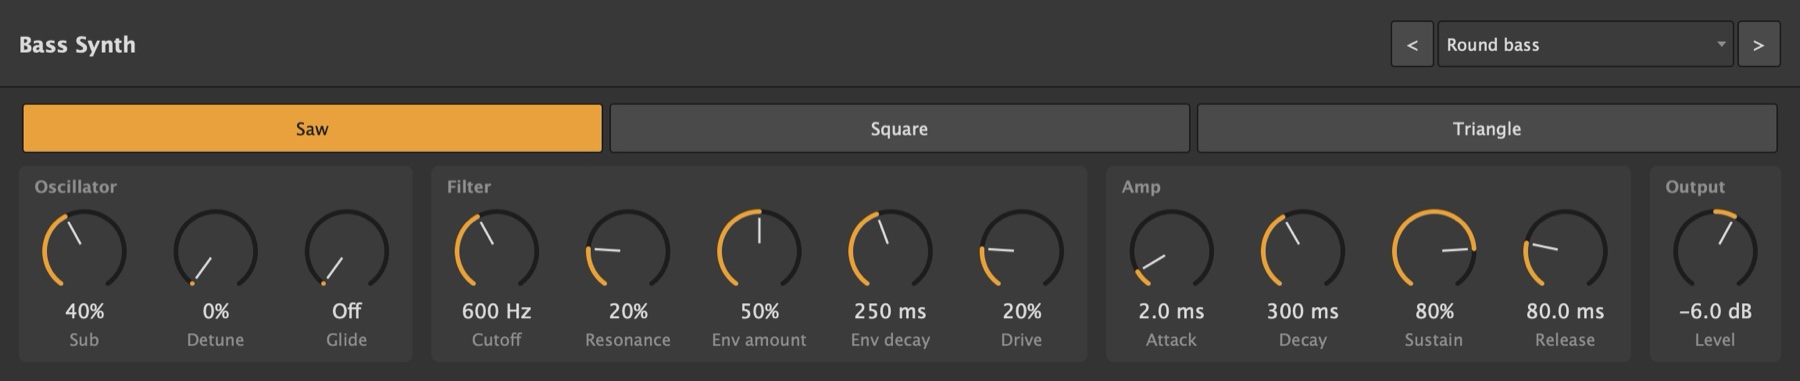
Bass Synth
A mono synth for basslines: saw, square or triangle, a sub an octave down, detune and glide, a 24 dB filter with its own envelope and drive, and an amp envelope.
Poly Synth
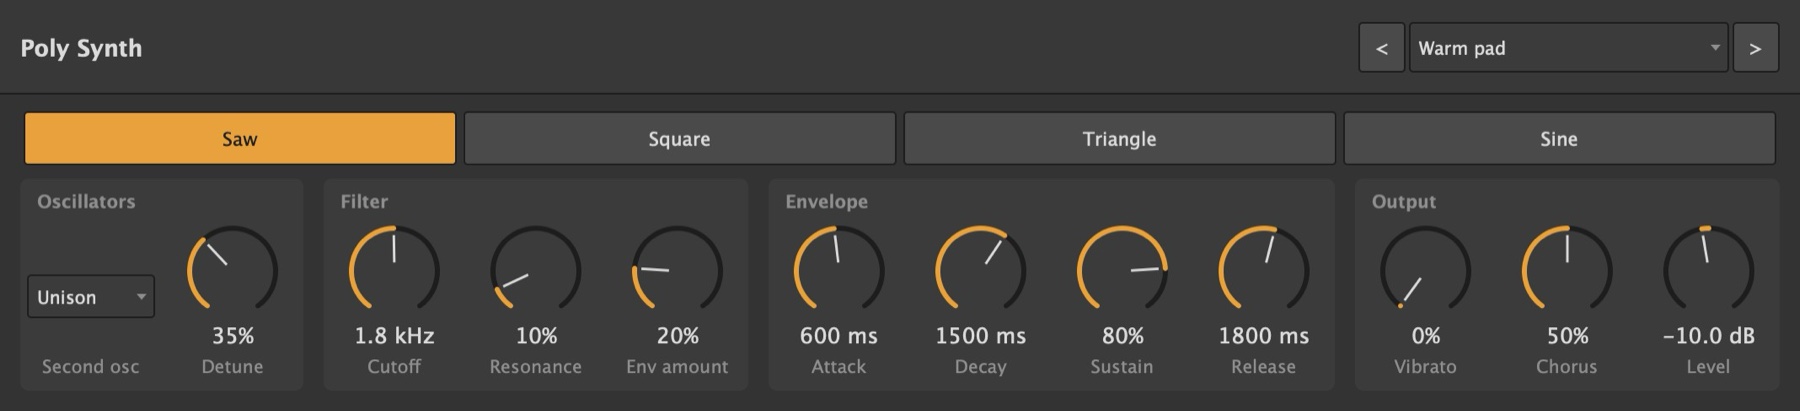
Eight voices for pads, keys, brass and plucks: two oscillators (unison, an octave or a fifth apart), filter, envelope, vibrato (plus the mod wheel) and chorus.
Piano
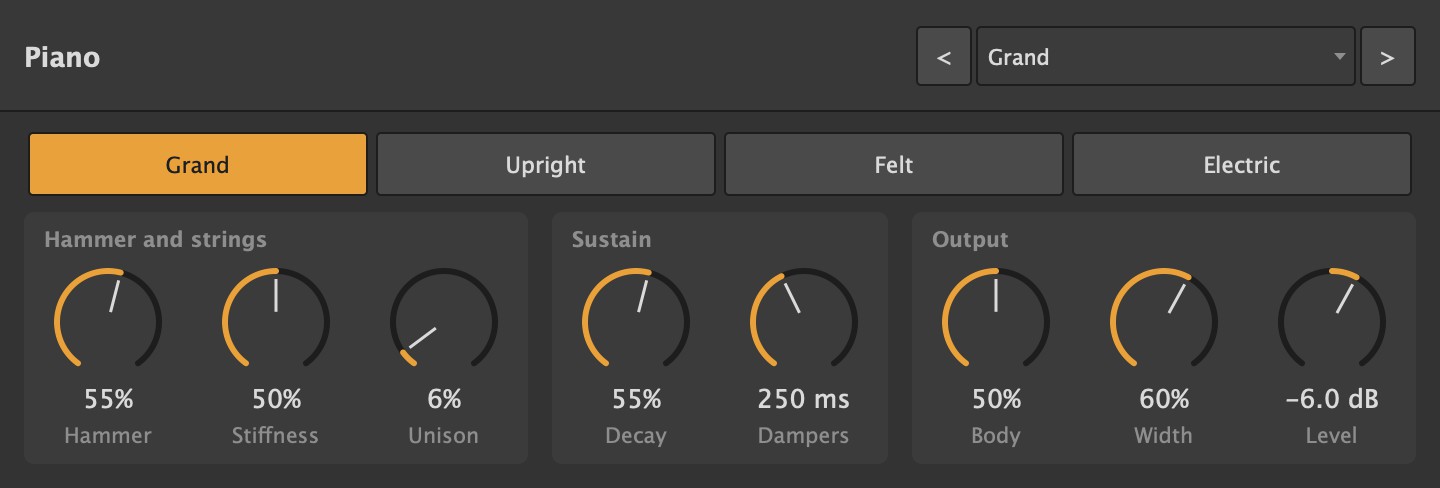
A modelled piano, no samples: grand, upright, felt or electric.
- Each key is one to three strings struck by a felt hammer. In the acoustic types the hammer drives the strings through the soundboard's own response, and a small body rings around them, longer with the sustain pedal down. Electric is the clean version, an electric-piano sound.
- Playing harder is louder and brighter.
- The sustain pedal (CC 64) and the soft pedal (CC 67) work. Letting go of a key damps it, except the top keys, which have no dampers on a real piano either.
- Controls: hammer, stiffness (how sharp the upper partials stretch), unison (in tune to honky-tonk), decay, dampers, body and width.
Drums
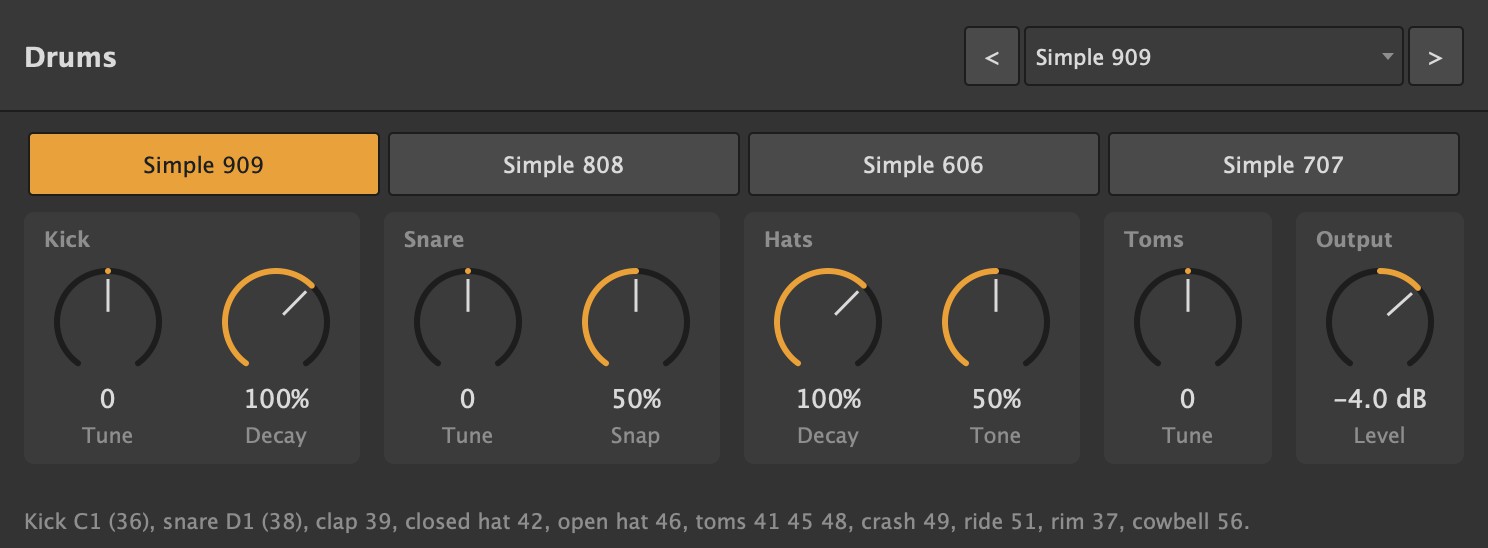
Synthesized kits in the style of the classic drum machines: Simple 909, Simple 808, Simple 606 and Simple 707. Tune and decay for the kick, tune and snap for the snare, hat decay and tone, and tom tune.
It plays the usual drum notes:
| Note | Drum |
|---|---|
| 36 | Kick |
| 37 | Rim |
| 38 | Snare |
| 39 | Clap |
| 42 | Closed hat (chokes the open hat) |
| 46 | Open hat |
| 41, 45, 48 | Toms |
| 49 | Crash |
| 51 | Ride |
| 56 | Cowbell |
Multi Synth
Eight voices, each one of 24 models: analog, waveshaped, FM (two-op, and six-op keys, bells and basses), phase distortion, wavetables, wave terrain, harmonics, formants, chords, string ensemble, chiptune, speech, swarm, filtered noise, particles, plucked string, struck bell, kick, snare and hi-hat.
Every model has the same three tone controls (Harmonics, Timbre, Morph), an envelope that can move Timbre, Morph and pitch, and an alternate output with a different version of the sound. Drums, strings, bells and six-op FM ring on their own and Decay sets how long; the rest follow Attack and Release.

Resonator
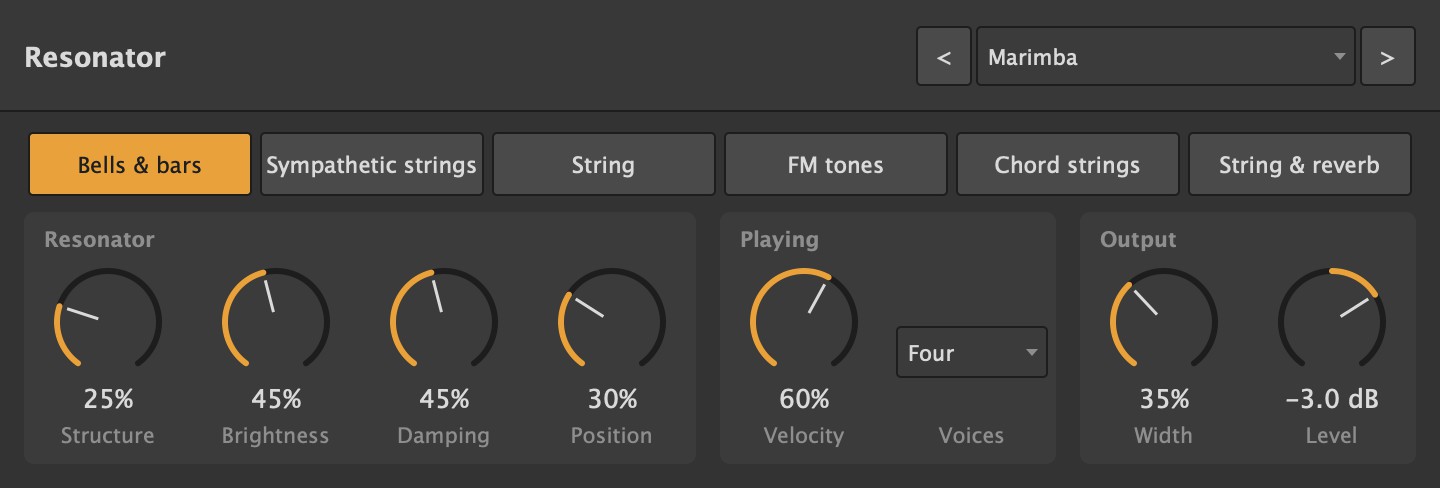
Strikes and plucks a resonating body: bells and bars, sympathetic strings, a single string, FM tones, chord strings, or a string into reverb. Structure, brightness, damping and position shape it, and playing harder sounds louder and brighter. One, two or four notes at once, with stereo width.
Note generator
Random Notes
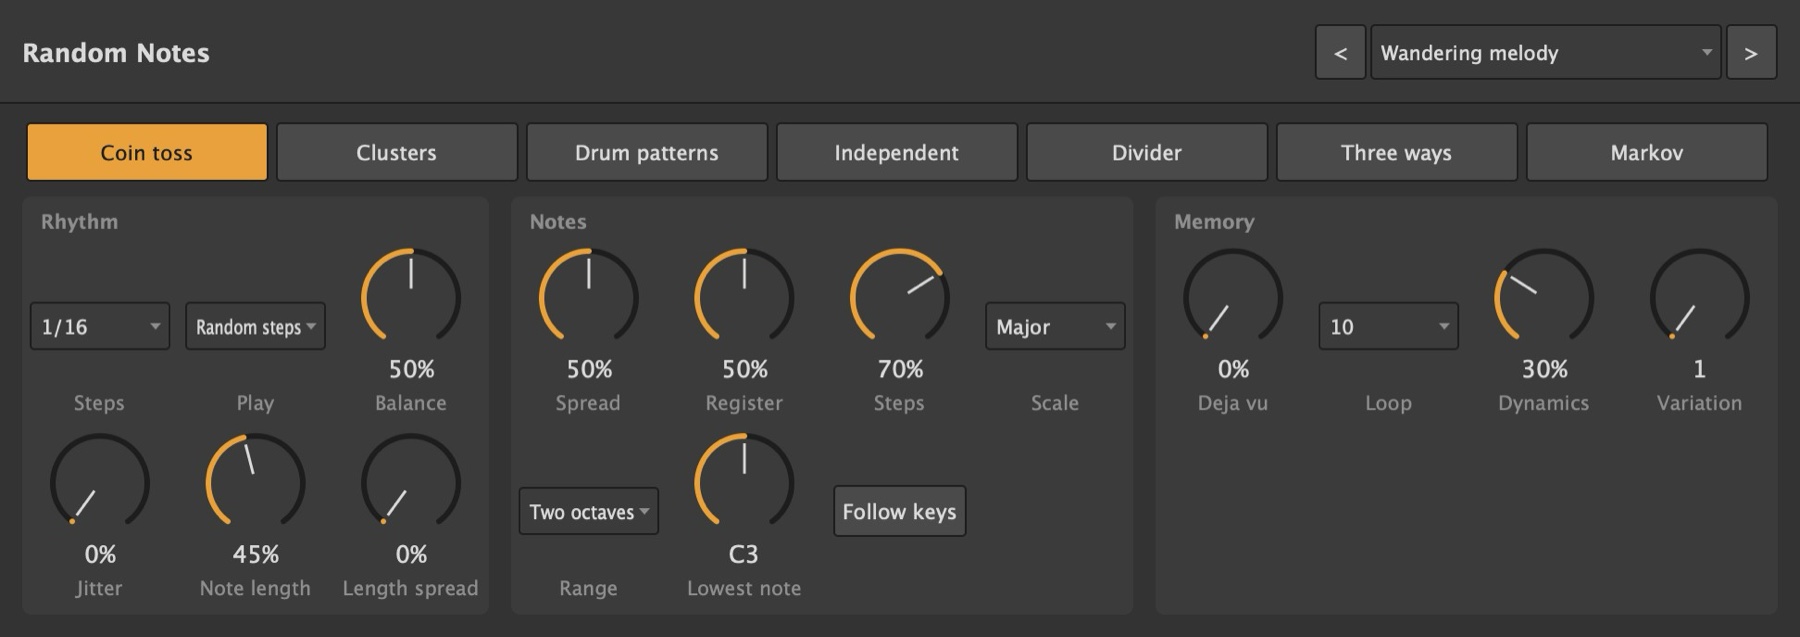
Put it before an instrument on a MIDI track and press play. It writes a melody in time with the song, from seven rhythms and a chosen scale (major, minor, pentatonic and three others), over a range you set.
- Déjà vu decides how much it repeats itself. All the way up, it loops the last 1 to 16 steps.
- Variation picks a different melody. The same Variation plays the same notes every time you press play.
- With Follow keys on, it only plays the notes you're holding.
To keep a melody you like, record it: see Record what a note generator plays.
Effects
Reverb
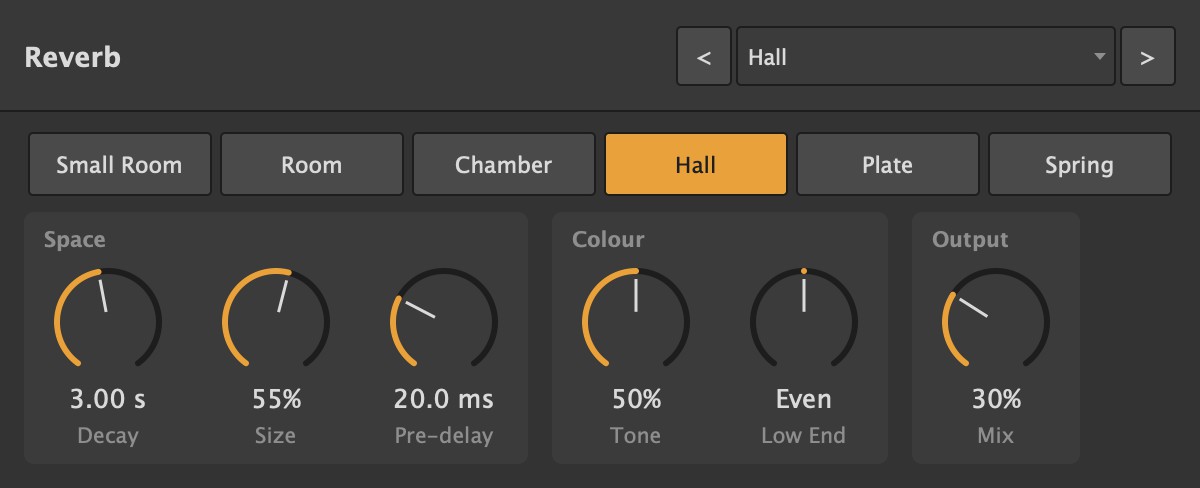
Small room, room, chamber, hall, plate and spring. Decay, size, pre-delay, tone, low end and mix.
Delay
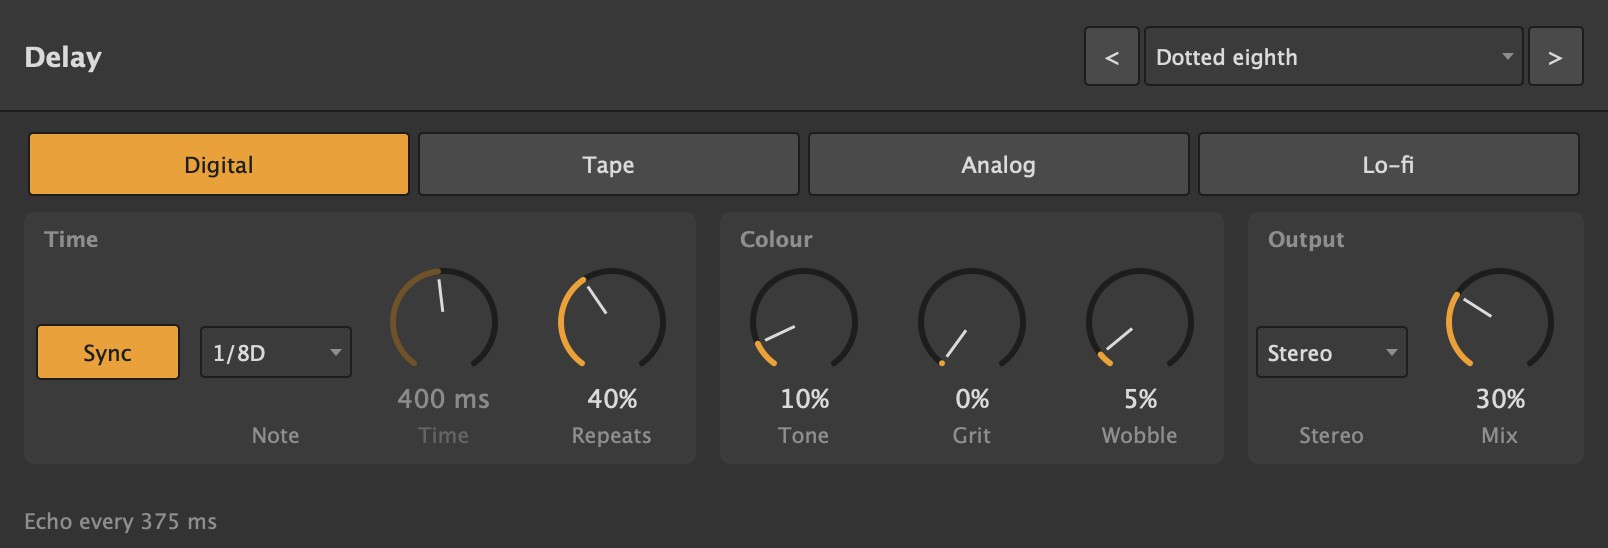
Digital, tape, analog and lo-fi echoes, synced to the song (a note value) or free (milliseconds). Repeats, tone, grit, wobble, stereo or ping-pong, and mix.
Grains
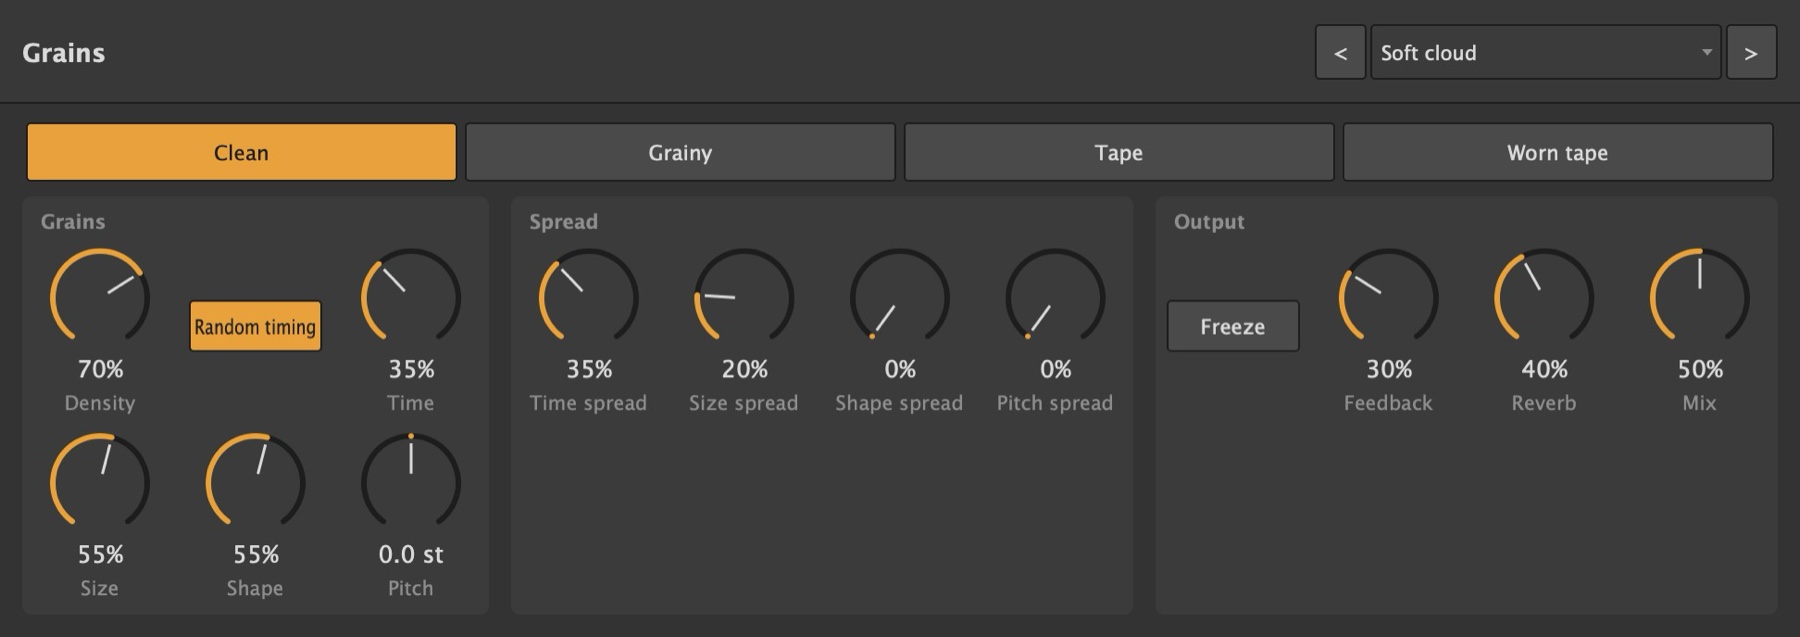
Cuts what you play into grains and plays them back: shorter or longer, earlier or later, shifted up to two octaves either way, regular or scattered, each with its own amount of randomness. Freeze holds what's in it. Four qualities, from clean to worn tape, plus feedback, its own reverb, and mix.
Compressor
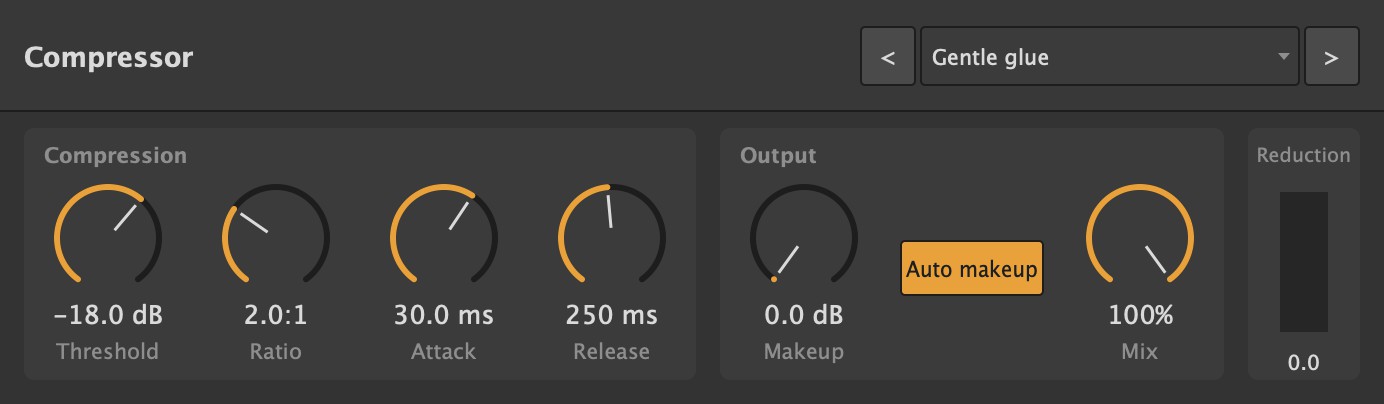
Threshold, ratio, attack, release, makeup (with auto makeup) and a parallel mix, with a gain-reduction meter.
Saturator
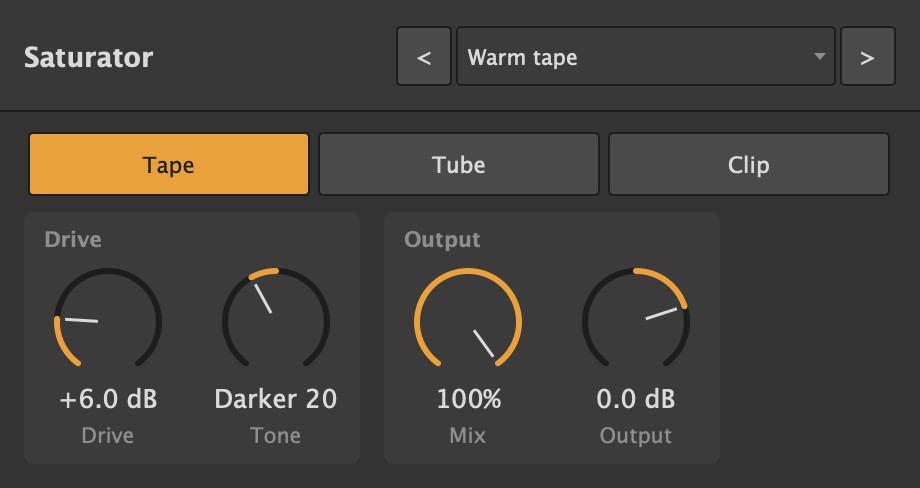
Tape, tube or clip, oversampled. Drive (level-matched), tone, mix and output.
Mastering
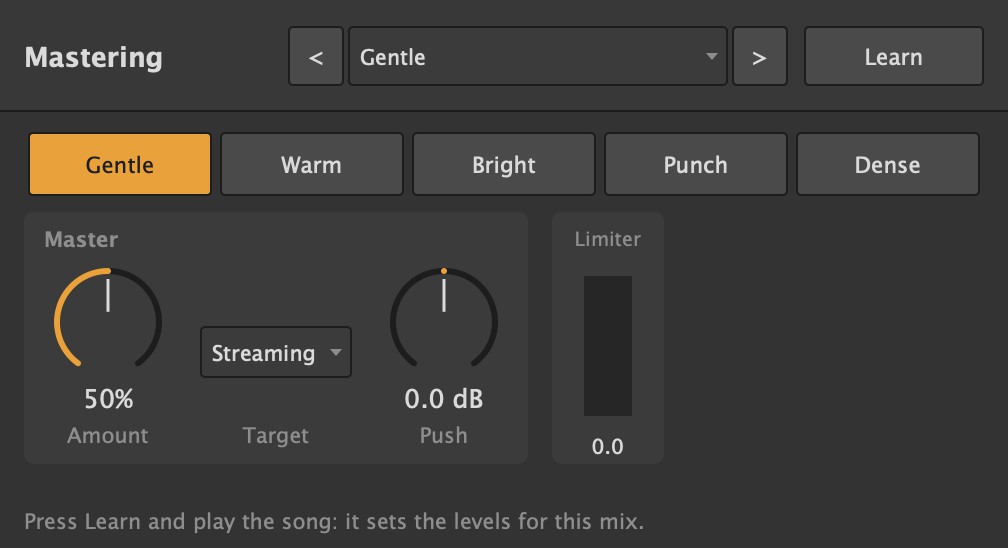
Finishes a mix to a loudness target (streaming, download, CD or vinyl) in one of five styles. Put it on the master, press Learn and play the song through so it sets its levels for this mix; Amount and Push do the rest.
The tuner
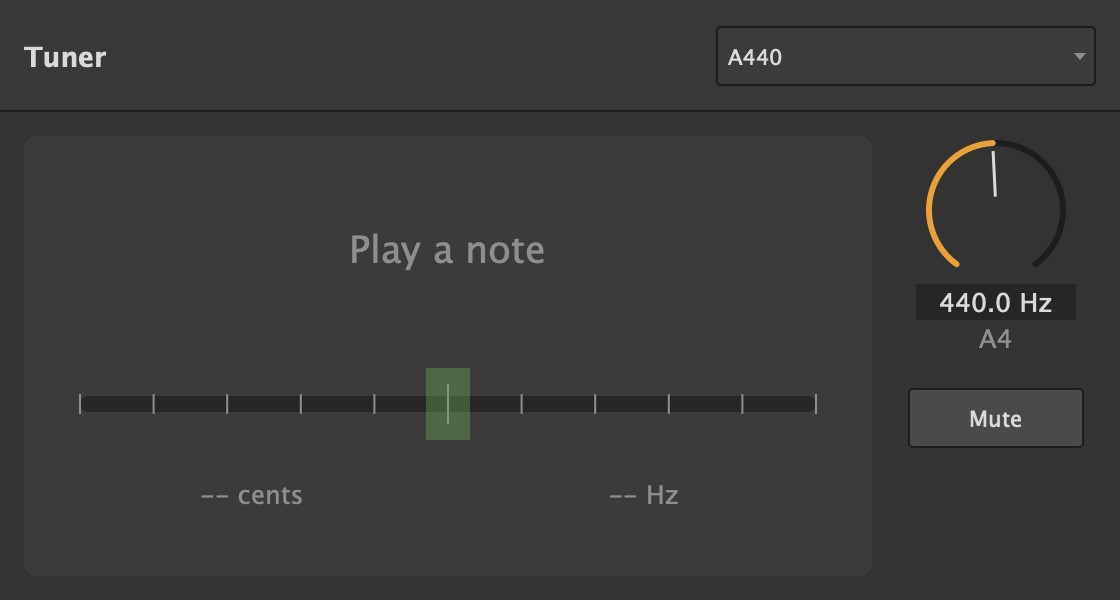
Tuner shows the pitch of what goes through it: the note, a needle from -50 to +50 cents (green within 3), and the exact frequency.
- Put it on the track you're tuning.
- Arm the track (or set its monitoring to In) and play.
- Mute silences the track while you tune.
A4 sets the reference: 440 Hz unless the band tunes elsewhere, with presets for 442, 443, 432 and 415. It reads a bass's low B up to the top of a guitar, and isn't fooled into the octave above by a string's strong harmonics. Notes are named as in the piano roll, with C3 as middle C, so a guitar's low E shows as E1.
The plug-in browser
Options > Plug-in Browser (Cmd/Ctrl+B), or Browse... in the device panel, lists Lathe's own devices and then every plug-in Lathe has found on this computer, with a search box and Effects and Instruments filters. Note generators such as Random Notes are listed with the instruments.
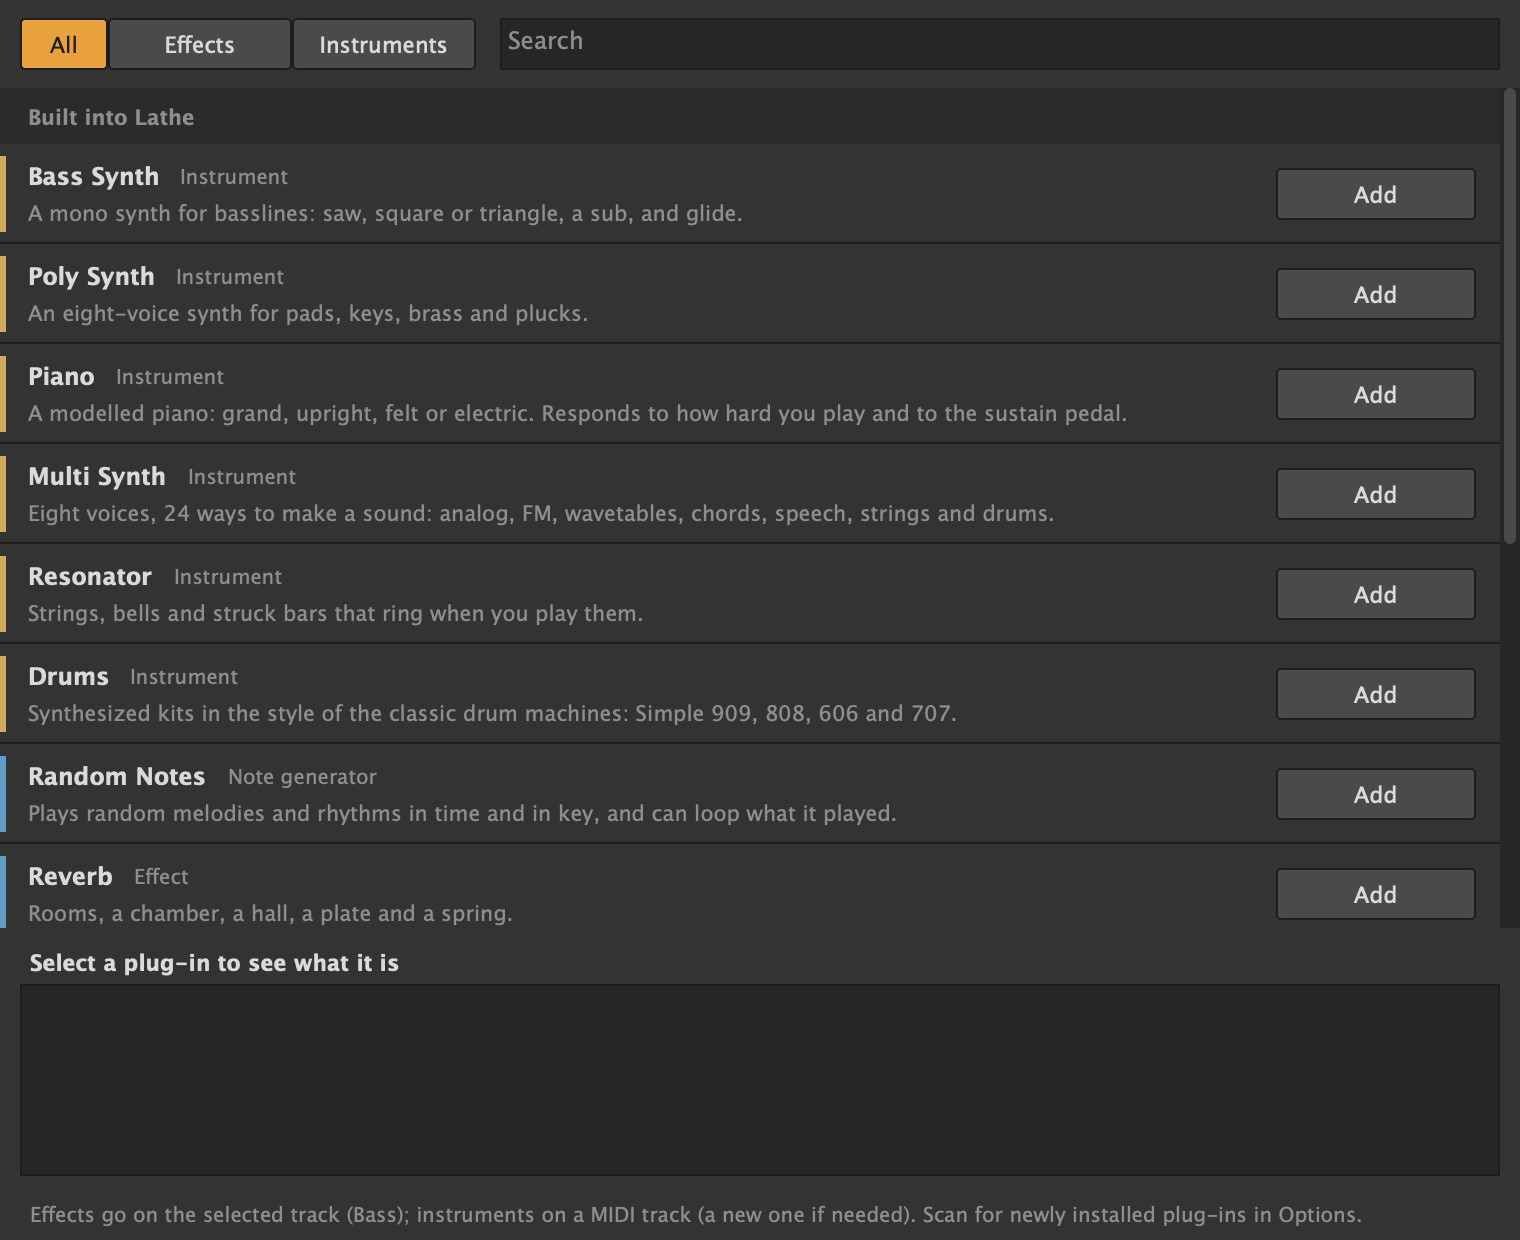
- Add (or double-click) puts an effect on the selected track (or the master), and an instrument on the selected MIDI track, or on a new MIDI track if that one already has an instrument. A note generator goes before the instrument.
- Right-click an installed plug-in to show it in the Finder or Explorer.
- To use a plug-in you've just installed, choose Options > Scan for New Plug-ins.
Plug-ins that crash
A plug-in that scans fine but crashes while you work can run separately: right-click it on the track and tick Run Separately.
- It then runs in its own helper program,
LatheHost. If it crashes, Lathe keeps playing: the plug-in goes silent (an effect lets the sound through untouched) and the status bar says so. - Right-click it > Restart brings it back with its settings.
- Its window opens on its own, from the helper. The project remembers the choice.
- It costs a little more CPU than running inside Lathe, so leave it off for plug-ins that behave.
If a plug-in crashes Lathe while a song is opening (some can't take settings saved by another version, or on someone else's computer), Lathe remembers which one it was and runs it separately from then on, so the song opens next time instead of crashing again. Turning Run Separately off undoes that.
Plug-ins someone else doesn't have
A song with a plug-in that isn't installed on this computer still opens, and nothing is lost. The plug-in shows in red ("Not installed. Settings are kept.") and keeps its settings, so it sounds as it did once it's installed again. Until then, a missing effect is skipped (the track plays dry) and a missing instrument is silent. You can still mix, move, bypass or remove it.